Well, I guess I was late again wasn’t I. In Thursday, I happen to have submerge myself fully in a conference. They left me very exhausted as I  went back home late and have a busy Friday to deal until now I have my time back again.
Yes, I still have my time to write on the other blog, so what’s my excuse? I’ve officially run out of it, beside that, the conference was so mesmerizing and fresh that I really felt the need to write down everything before I forgot so they just happen.
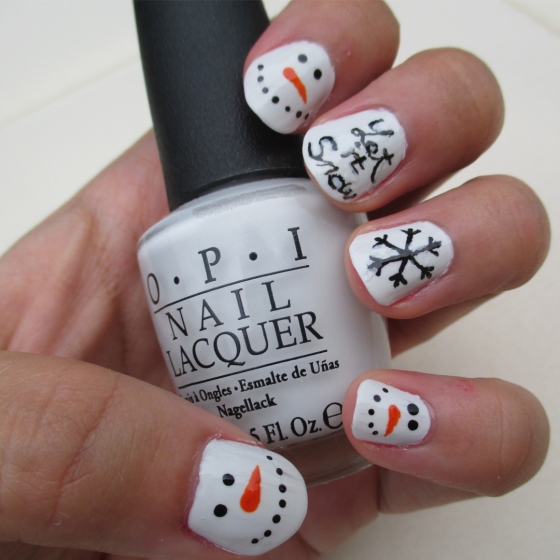
Anyway, let’s get back to the nail art. You got white polish? If you do, you will be so ready to have your nails all cute with Snowy! Here’s what I need to accomplish the nail art above.
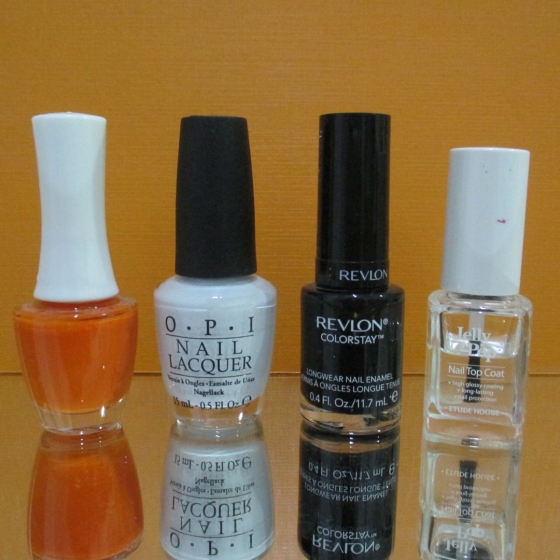
Polish Used (Left-Right)
The Face Shop Lovely Me Ex Nails – OR202
O.P.I Nail Lacquer – NL M37 My Boyfriend Scales Walls
Revlon Colorstay Longwear Nail Enamel – 270 Stiletto
Etude House Jelly Pop Nail Top Coat
As for the tools, I used these:
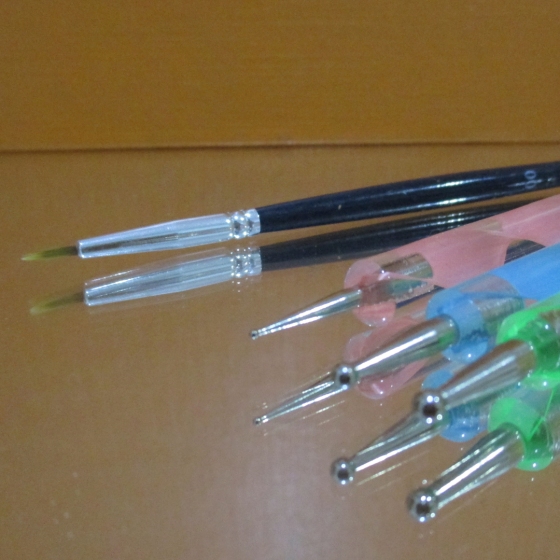
A simple brush from Lyra (this brush is actually meant for painting) to do the snowflakes and coupled with many dotting tools in various sizes. Green dotting tools certainly the biggest in diameter, and I used it for the nose of Snowy which after I dot, I simply stretch it out carefully to make it like a carrot. Middle blue dotting tool is used for dotting the cute eyes of Snowy. Pink dotting tool is used for the curves of the Snowy’s mouth. Pretty simple?
In my opinion, this is actually the simplest nail art of all 5 I have created for this season, so if you would want to start, it’s really wise to start with Snowy. It’s okay if at first you don’t succeed, keep on trying! I can’t even stop shaking and ruined the whole nail look the first time I try nail art, but now hopefully we agree that I did okay. Right?
Anyway, this is so simple, you can even do it better than me perhaps, and I would like to re-emphasize that this is not an original creation, I was just recreating and breaking down what I saw from many pins on Pinterest.
Until next one, see you readers!
~evitiev

